Sunday, August 27, 2006

Assignment 4


This is my book cover assignment. After submitting, I recognized that I made a mistake about the position of text on the spine. But anyway, footprints in my design are inspired from the idea of the traveller. The picture of a rainy day was put into the footprint. And I also tried to create a background which is fuzzy like a fog with the combination between dark and light areas; and after playing with the photoshop brush for a while, I got this background.

Tehran Theatre Logo


This logo is designed by Maziar Zand. It is inspired from the traditional logo for theaters (the smiling face and the sad face). But the artist created a new design which has a very modern and dynamic style.

References:
www.icograda.org

Sunday, August 20, 2006

Icograda

Icograda is a very intresting website with hundreds of graphical design from many artist. These are 2 artworks in this website.


Career Development Center identity of Anatol Kuzmi. These symbols represent for stair's steps from low to high of the career and they also show the position of a worker at each step (for example: the lowest step is the employee bowing and the last step depicts the stance of the big boss).


Hiroshima is a poster of Tarik Jesenkovic. I like it because it uses a very simple shape to express the meaning. This poster is inspired from the national flag of Japan with the meaning that Hiroshima is the black point of the human history.

Reference:
http://www.icograda.org/

Alien Vision


Bird Thing


Discgo


Dragon Bomber

These paintings are drawn by James Eugene Albert, he calls them as "Alien Vision". I like the way he used computers in his work. Through these pictures, he tried to put souls into his paintings.

He also said that "In my world, complete mastery of my tools is my ability to take a slightly souped-up "ordinary " desk top computer and turn it into a virtual set of artist's palettes and tools that can create extraordinary art." (James Eugene Albert)

References:http://www.worldfineart.com/

Sunday, August 13, 2006

Islamic Arts

Islamic art is a term used to describe artworks influenced by Islamic cultures including architecture, painting, calligraphy, pottery and metalwork. So, characteristics of this kind of art are often defined by the philosophies of Islam.

This is an example of pottery with the Arabic word at the center of the disk means Allah.


Instead of depicting human figure like in Christian art, in some Muslim cultures such as Arab Islamic Art, depictions of human being are forbidden. This reason leads to the lack of portraits in Islamic art even portraits of the Prophet Muhammad.

An example of geometric designs:

Islamic art is mainly focus on Allah, and as Allah cannot be represented by pictures, Muslims usually uses geometric designs to symbolize him. Another important branches of Islamic art is Arabic calligraphy which is used to express the beauty in the verse of Qur'an.

These are 2 example of Arabic calligraphy which are Diwani and Farsi fonts.


References:
http://en.wikipedia.org/wiki/Islamic_Arts
http://www.turkeytravelplanner.com/http://www.jorgetutor.com/
http://tallis.umd.edu/~pfeifer/turkey/images/I/13

Signed and Sealed

"Signed and Sealed" is a series of 30 lithographs of Pat Elliott Shircore. These lithographs were extracted from the orginal Treaty of Nanjing document which was signed in 1842 when China gave Hongkong to Britain. Pat has scanned them into her computer to do the digital processing to improve the quality of the original lithographs.


Not only having historical values, these lithographs also have values in art with texture, charactors and seals.


These following images are some example of the "Signed and Sealed" collection.


References:
http://www.artasialink.com/

Sunday, August 06, 2006

Creating a banner with matrix effect

Step 1: Create a 500x200 pixel image with white background

Step 2: Filter/Texture/Grain with Grain Type = Vertical, intensity and contrast both equal to 100%.


Step 3: Filter/Artistic/Neon Glow with Glow Color is green.


Step 4: Filter/Stylize/Glowing Edges


After step 4, you will have the result like this.


Use Image / Adjustments / Hue/Saturation to change the color into green.


Finally, your matrix banner will look like this picture.


References:
http://www.newtutorials.com/matrix-effect-tutorial.htm

Creating A Channel Mask in Photoshop

Channel Mask is the most time-consuming mask in Photoshop but it allows you to make accurate selections for complex objects such as hair or leaves which the other tools can not do (Lasso or Magic Wand tools).
For example, I will use channel mask to select my brother’s hair from his picture to illustrator how to use mask.

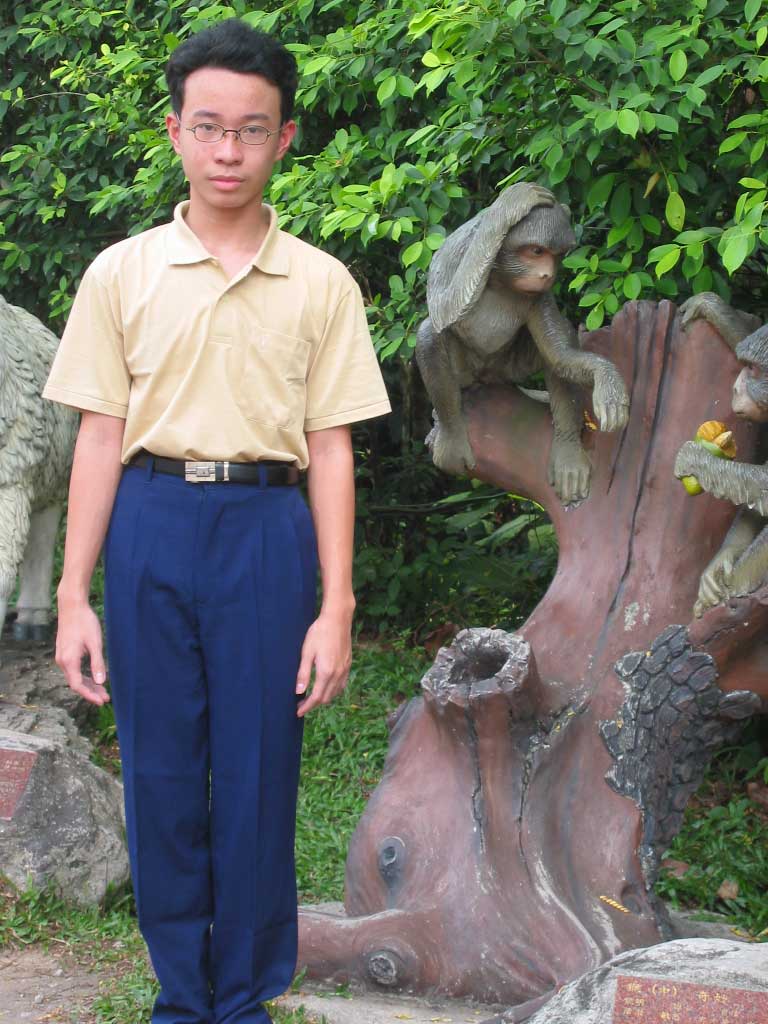
This is the original image


Step 1: Open the channel palette and find in your existing channels to find a channel which has the most contrast between what you want and don’t want to select.
In this case I use the Green Channel

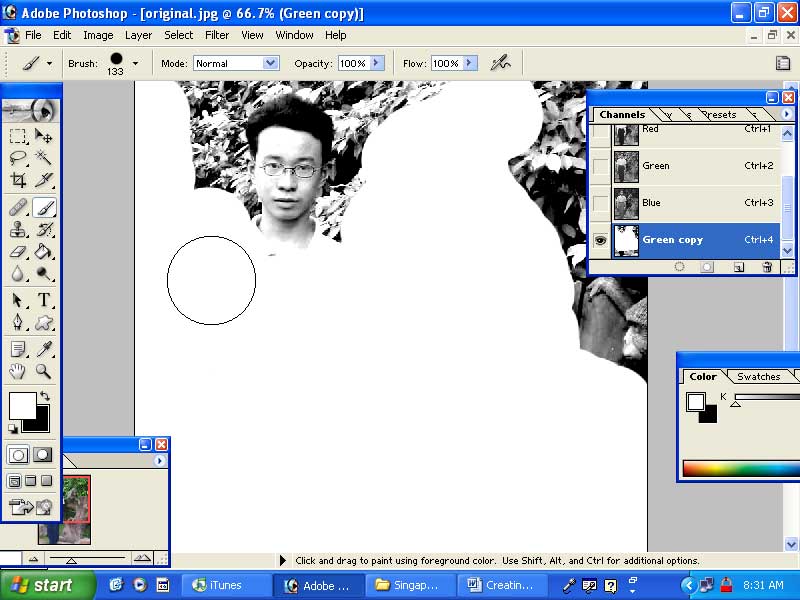
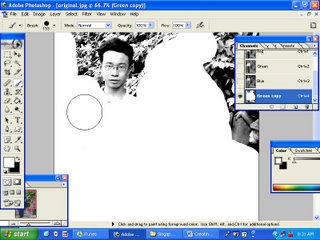
Step 2: Duplicate your chosen channel. Until now, we only work in this channel.

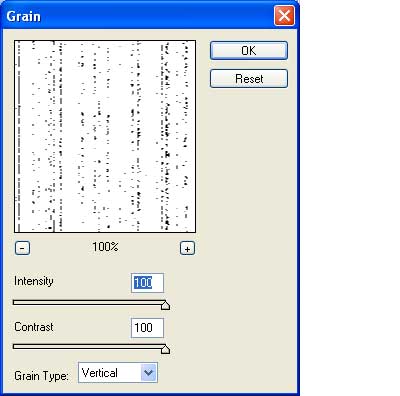
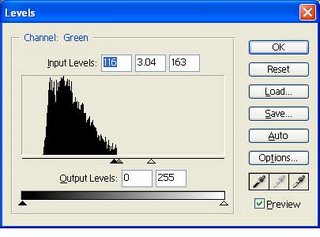
Step 3: Choose Image – Adjustments – Levels. Use the histogram to increase the contrast between the element you want and don’t want to select.


Step 4: Use brush to refine the mask. Paint white color for areas you want to add in your selection and black to remove them from the selection. This step will take you most of your time to finish. In this case, as I paint black for the hair and white for the other areas, I need to reverse the selection after finish the mask.


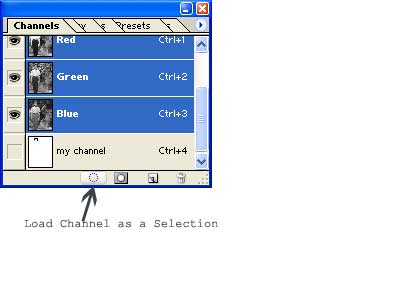
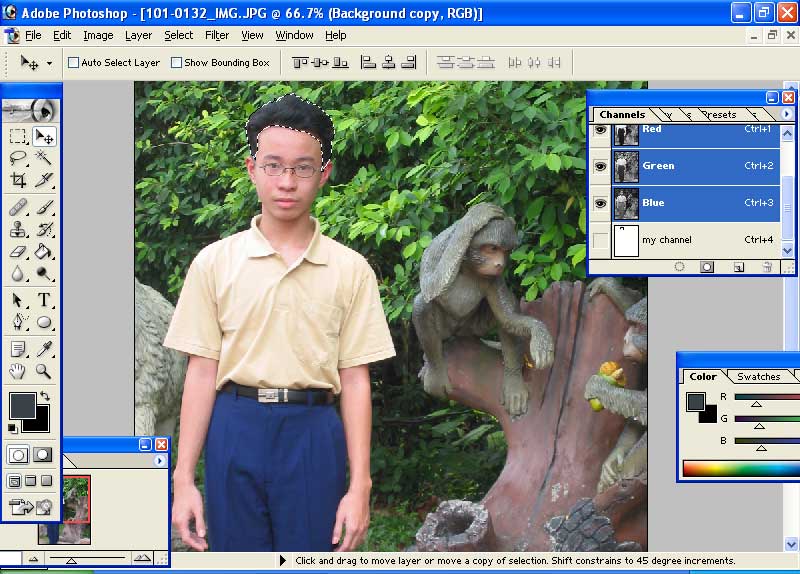
Step 5: Now, you’ve had a very precise channel mask. The only work is only loading this mask as your selection.