Step 2: Filter/Render/Clouds (this is the most common step in generating a background picture in Photoshop.)
 Step 3: Filter/Pixelate/Mezzotint. I choose Long Stroke in the Type box.
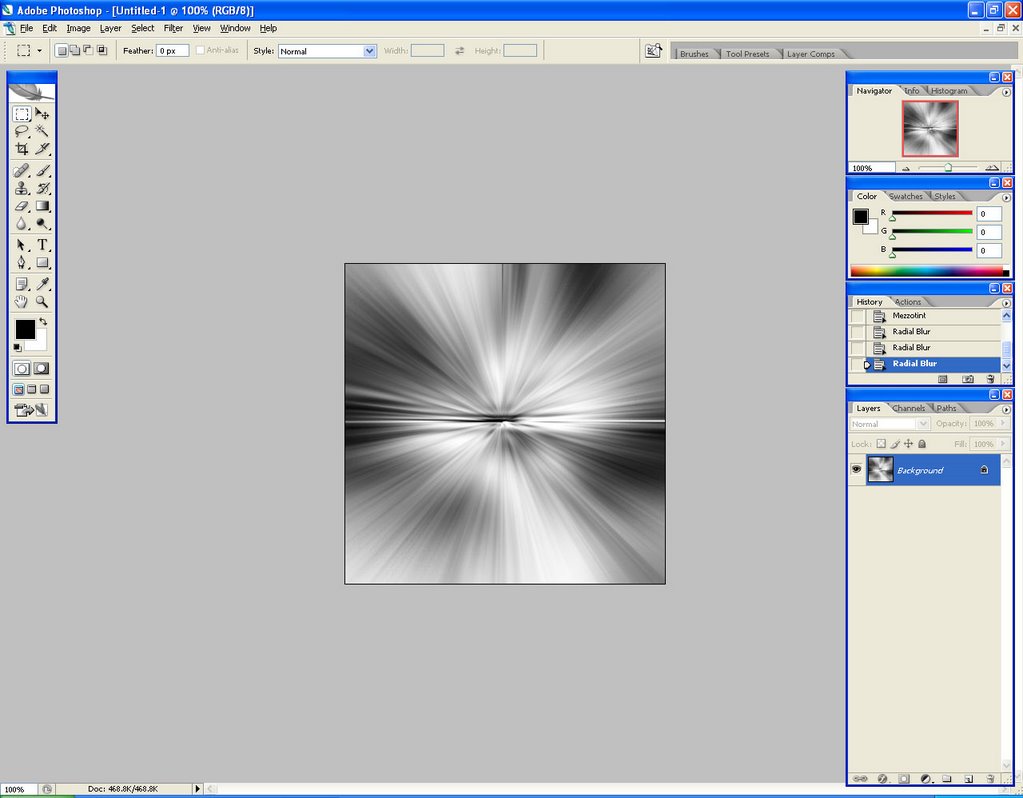
Step 4: Filter/Blur/Radial Blur with amount = 100, Blur Method = Zoom and Quality = Best. Press Ctrl-F 2 times to apply this effect 2 more times.
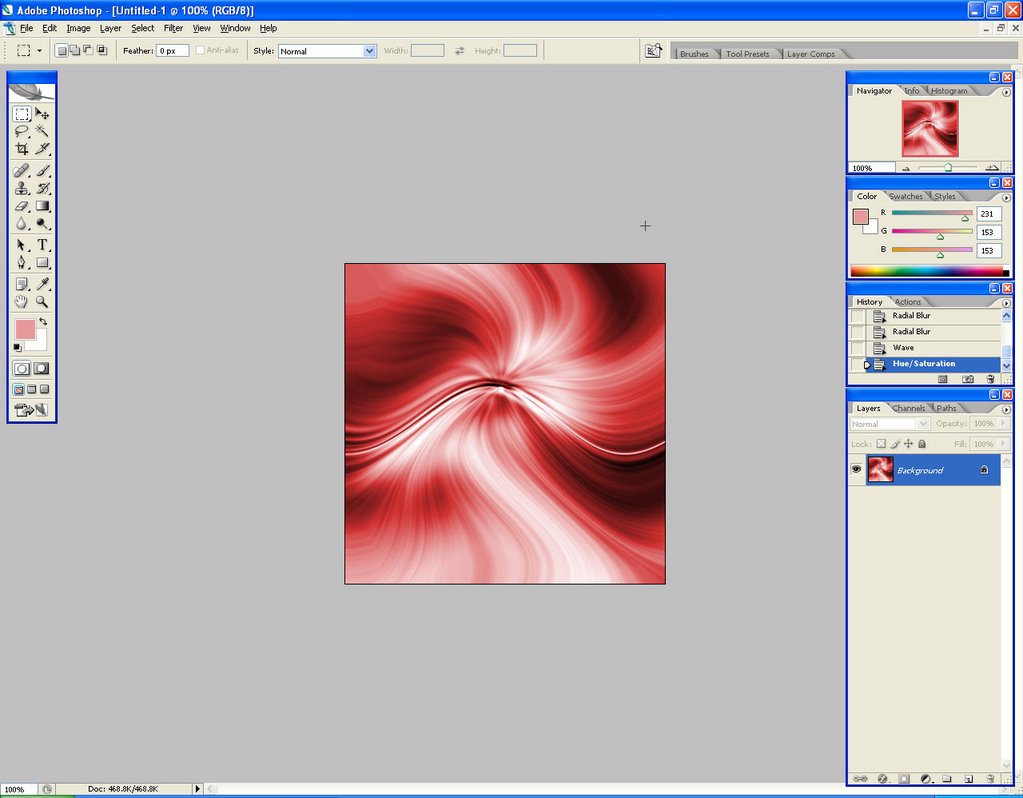
 Step 5: Filter/Distort/Wave. You can experience changing numbers in the option box to create different results. This is my choice:

Step 6: Now, I apply colours for the picture by using Image/Adjustments/Hue&Saturation
Step 7: Dupplicate the layer, Image/Rotate Canvas/Flip Canvas Horizontally for the layer on top. Change the blending mode of this layer into Overlay and reduce its opacity as well. This is the result:

Step 8: Merge 2 layers together, repeate step 7 for the new layer but use the Flip Canvas Vertically and the Vivid Light blending mode.
No comments:
Post a Comment